
Tutoreal for new portraits making
2 posters
Page 1 of 1

Tutoreal for new portraits making
 Finn MacCumhail Wed Jan 13, 2010 3:25 pm
Our Project needs more historical-accurate portrait cards for FM from different cultures. For example India, Arabia, Nomad ones. Standard portraits doesn't always solve our need. Feeling the necessity to share my experience in Portraits making, I wrought these tutorial. 
Here are we going. As example we will make the portrait of hellenized Saurmatian, which would suit for Bosporos.
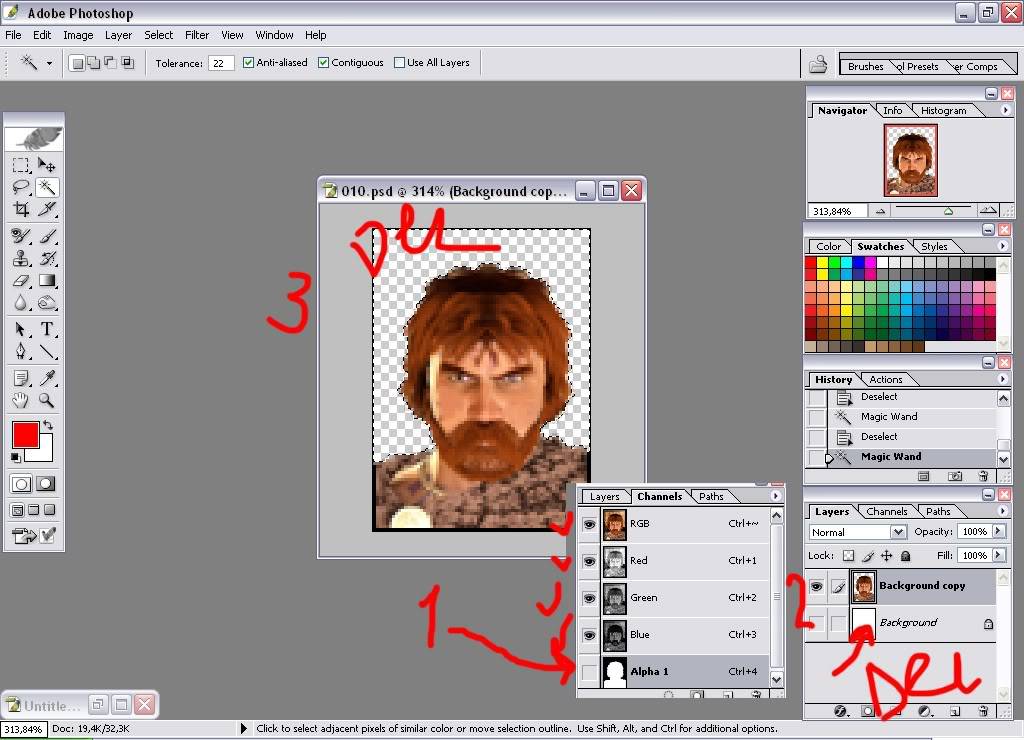
Go to …\Rome - Total War\EB\Data\UI\BARBARIAN\PORTRAITS\PORTRAITS\YOUNG\GENERALS – copy those portraits somewhere else and work with copied ones. I choose № 10. Open it with Photoshop. Mouse Right click on the Background, (see picture). Duplicate layer. Save file as .PSD.

Now got to the Alpha channel and select black are with the Magic Wand. Turn off Alpha, switch on RGB (up to the Alpha), go to Layers. You have Magick wand selection; use it to clean everything except face. Delete Background Layer, then it would be white.

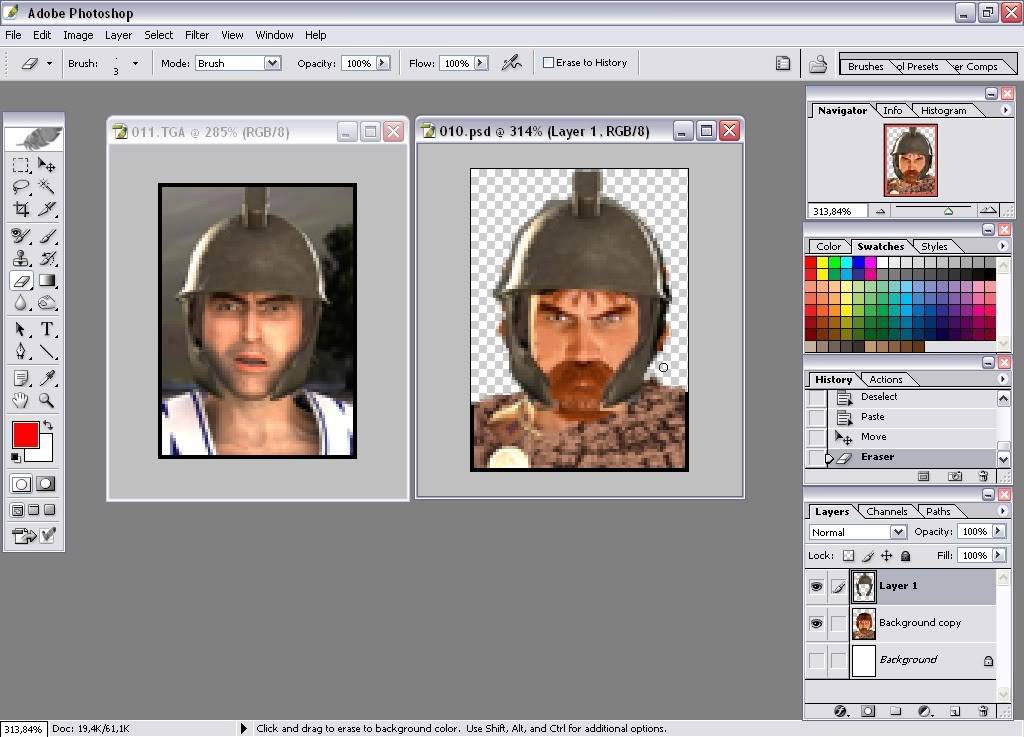
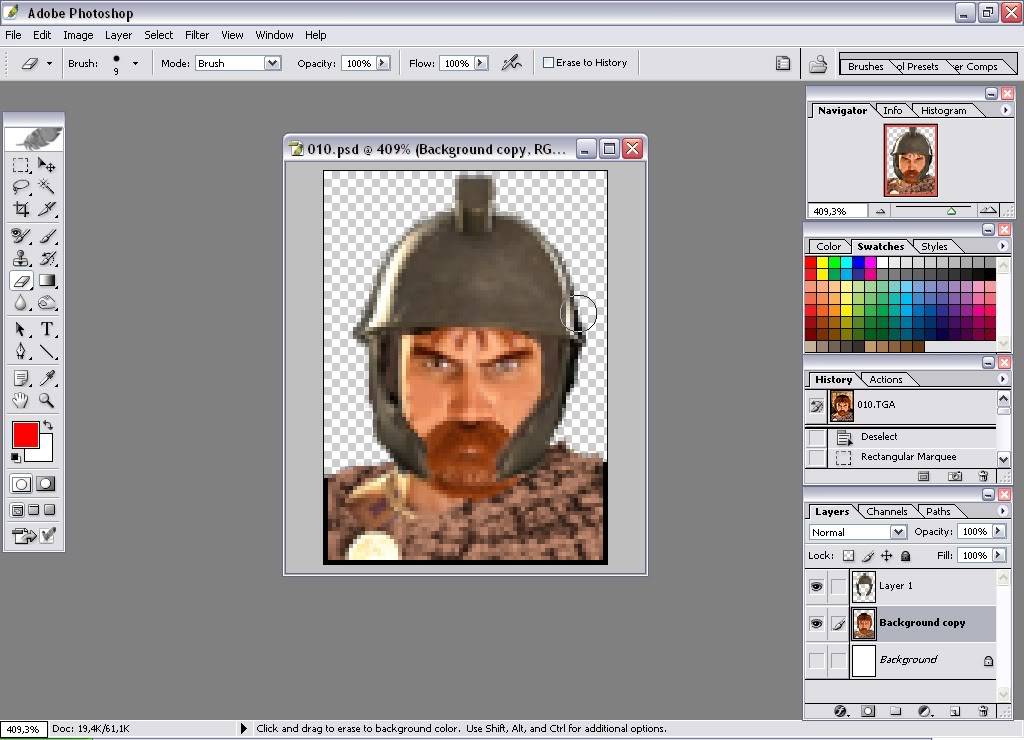
Let’s add him a helmet. Visit …Rome - Total War\EB\Data\UI\GREEK\PORTRAITS\PORTRAITS\YOUNG\GENERALS choose №11. His face position suits our number 10. Using Lasso select and copy his helmet. Paste it into our PSD file. Good. If there are some extra things, delete them with Eraser. Helmet situated on its own layer, so no problem, you will not hurt face. Now if you see hairs from helmet that looks unnatural (just like they grow on the helmet, you know what I am talking about? You will see it. Then delete them on 2-nd layer).
Time for Google. Try to find some picks with the Steppe.
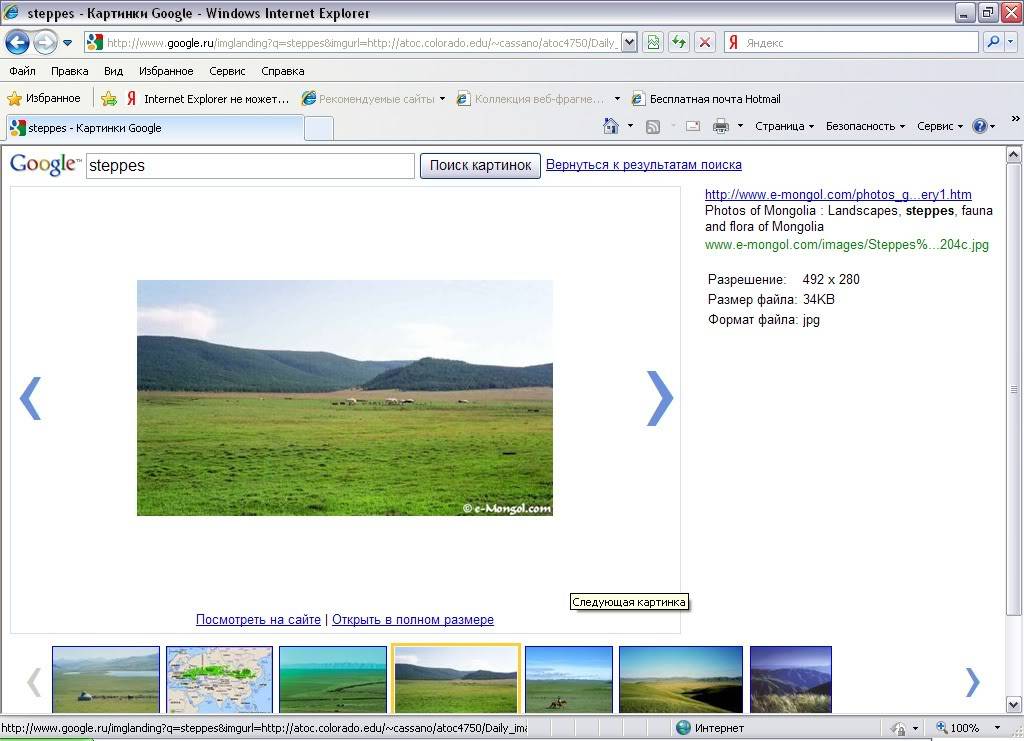
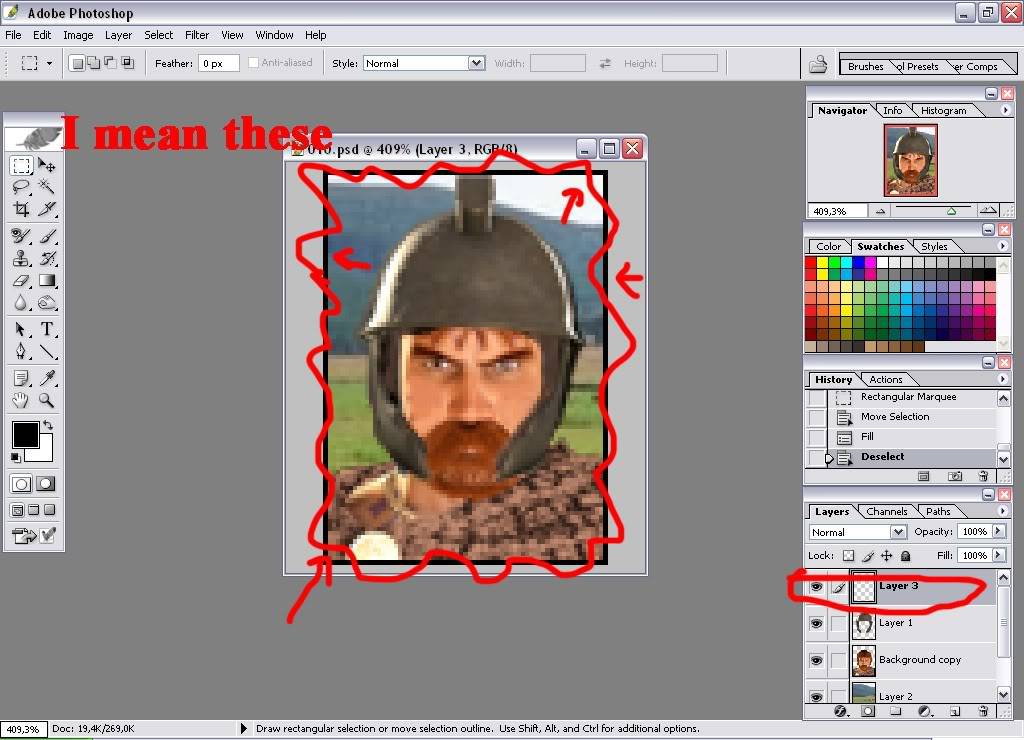
Use one of them for Background. Then create new Layer and place it on the top. Draw a black rectangle on the boader.
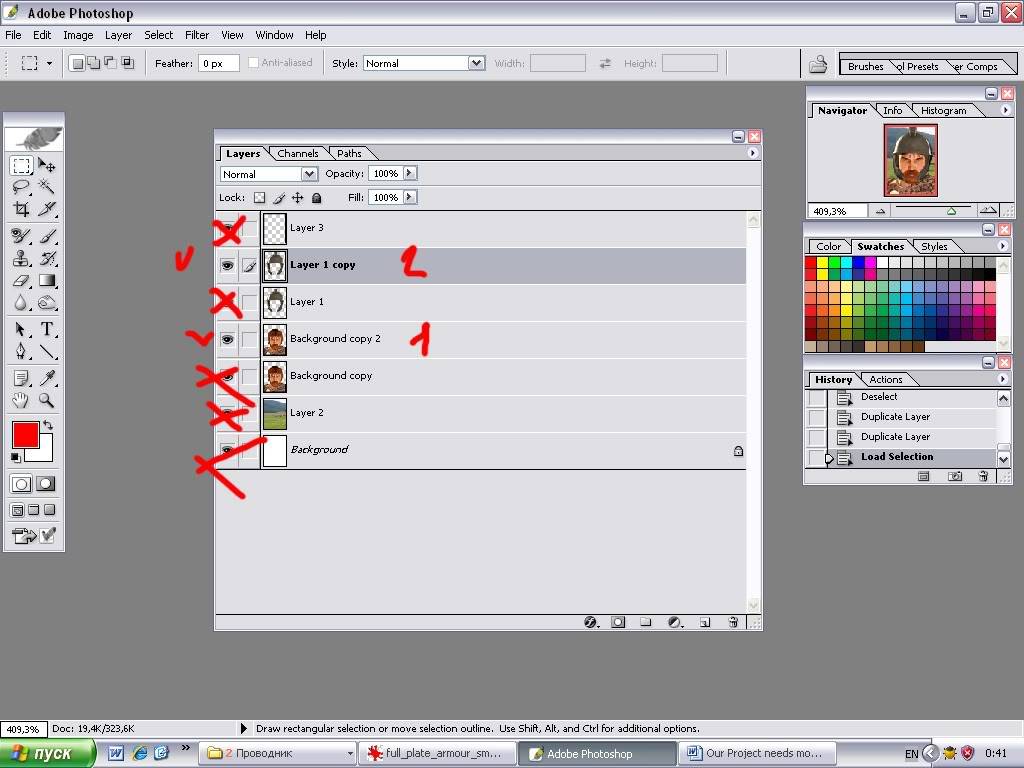
Now correct the Alpha layer. First of all duplicate layers with helmet and face. Switch off the eye icon to all but these new layers. Then Layers>Merge visible. Or Shift+CTRL+E.
Select with the Magic Wand free space (you se checkers there). Keep selection. Go to Alpha channel. Fill selected with black. Then select inverse and fill with white. Return to the normal mode. Delete that layer where face and helmet merged. Switch on all Layers. Do Merge visible. Save as 10.TGA.

Good. Now in Photoshop history undo merging. Find portrait 10 but old, from …\Rome - Total War\EB\Data\UI\BARBARIAN\PORTRAITS\PORTRAITS\OLD\GENERALS. Open with Photoshop. You know. Replace yang with old. Merge visible. Save as TGA.

Now if you open it with for example InfranView, you will see that Alpha channel works properly, and no background visible.
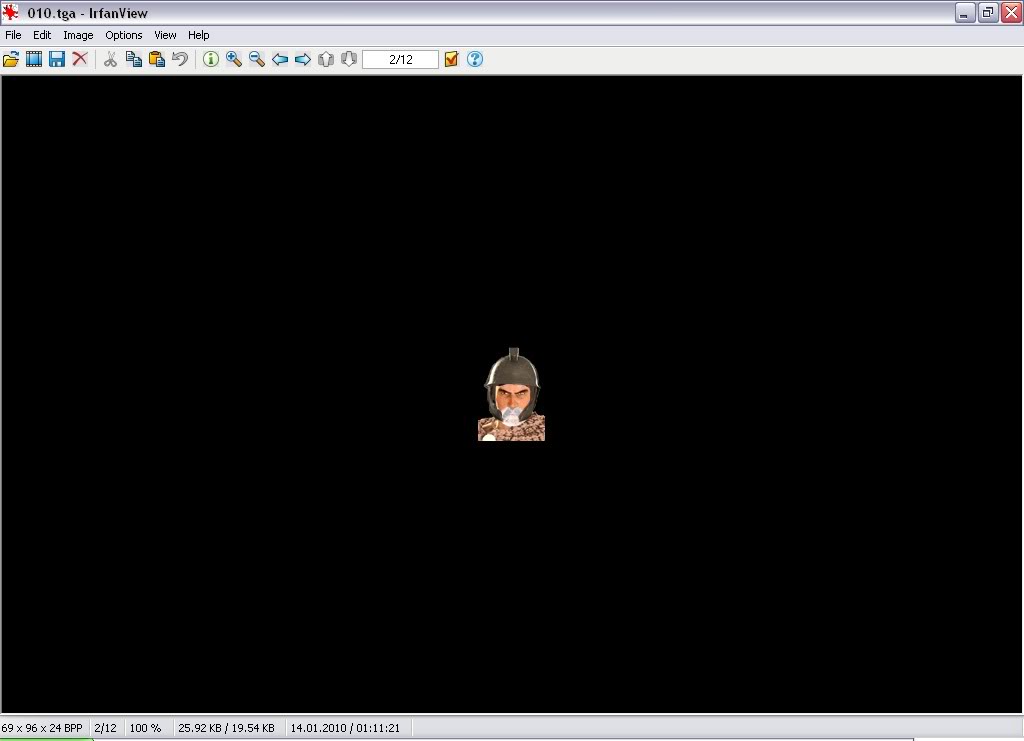
Something like these.
Here are we going. As example we will make the portrait of hellenized Saurmatian, which would suit for Bosporos.
Go to …\Rome - Total War\EB\Data\UI\BARBARIAN\PORTRAITS\PORTRAITS\YOUNG\GENERALS – copy those portraits somewhere else and work with copied ones. I choose № 10. Open it with Photoshop. Mouse Right click on the Background, (see picture). Duplicate layer. Save file as .PSD.
Now got to the Alpha channel and select black are with the Magic Wand. Turn off Alpha, switch on RGB (up to the Alpha), go to Layers. You have Magick wand selection; use it to clean everything except face. Delete Background Layer, then it would be white.
Let’s add him a helmet. Visit …Rome - Total War\EB\Data\UI\GREEK\PORTRAITS\PORTRAITS\YOUNG\GENERALS choose №11. His face position suits our number 10. Using Lasso select and copy his helmet. Paste it into our PSD file. Good. If there are some extra things, delete them with Eraser. Helmet situated on its own layer, so no problem, you will not hurt face. Now if you see hairs from helmet that looks unnatural (just like they grow on the helmet, you know what I am talking about? You will see it. Then delete them on 2-nd layer).
Time for Google. Try to find some picks with the Steppe.
Use one of them for Background. Then create new Layer and place it on the top. Draw a black rectangle on the boader.
Now correct the Alpha layer. First of all duplicate layers with helmet and face. Switch off the eye icon to all but these new layers. Then Layers>Merge visible. Or Shift+CTRL+E.
Select with the Magic Wand free space (you se checkers there). Keep selection. Go to Alpha channel. Fill selected with black. Then select inverse and fill with white. Return to the normal mode. Delete that layer where face and helmet merged. Switch on all Layers. Do Merge visible. Save as 10.TGA.
Good. Now in Photoshop history undo merging. Find portrait 10 but old, from …\Rome - Total War\EB\Data\UI\BARBARIAN\PORTRAITS\PORTRAITS\OLD\GENERALS. Open with Photoshop. You know. Replace yang with old. Merge visible. Save as TGA.
Now if you open it with for example InfranView, you will see that Alpha channel works properly, and no background visible.
Something like these.
Finn MacCumhail- Citizen

- Posts : 44
Join date : 2009-11-26
Age : 33
Re: Tutoreal for new portraits making
Finn MacCumhail Wed Jan 13, 2010 3:28 pm
Oops, picks dont suit the screen, what to do? Should I Make them smaller and load again? Or is there some other solution?
Finn MacCumhail- Citizen
- Posts : 44
Join date : 2009-11-26
Age : 33
Re: Tutoreal for new portraits making
Skullheadhq Sat Jan 16, 2010 9:08 am
You should edit the silver beard 
Skullheadhq- Noble

- Posts : 165
Join date : 2009-07-29
Page 1 of 1
Permissions in this forum:
You cannot reply to topics in this forum|
|
|